Wednesday, October 18, 2017

Configure Jenkins and Xvfb plugin on Ubuntu

Introduction

Some build workflows in Jenkins require the display. If you run the build of Java application in console following exception might happen.
Exception in thread "main" java.lang.InternalError: Can't connect to X11 window server using '' as the value of the DISPLAY variable.
I found a solution how to fix it using  Xvfb.

Installation of Xvfb

1. To install Xvfb run following command in terminal.
sudo apt-get update
sudo apt-get install xvfb

Installation of Xvfb Plugin

1. I have an assumption that Jenkins is installed and running on Ubuntu 16.04. Please follow installation instructions to install Jenkins in case you do not have running Jenkins. 
2. Install Xvfb plugin. Please follow instructions for plugins installation.


Configuration of Xvfb Plugin

If plugin configured incorrectly you might have the following exception:
ERROR: No Xvfb installations defined, please define one in the configuration. Once defined you’ll need to choose one under Advanced options for Xvfb plugin job settings and save job configuration.
To fix it:
1. Navigate to  Manage Jenkins → Global Tool Configuration → Xvfb installation
2. Set Name: Xvfb
3. Set Directory in which to find Xvfb executable: /usr/bin


Xvfb installation

Troubleshooting

1. In case you still have the issue, try to play with the configuration of 'Start Xvfb before the build, and shut it down after.' step. E.g.

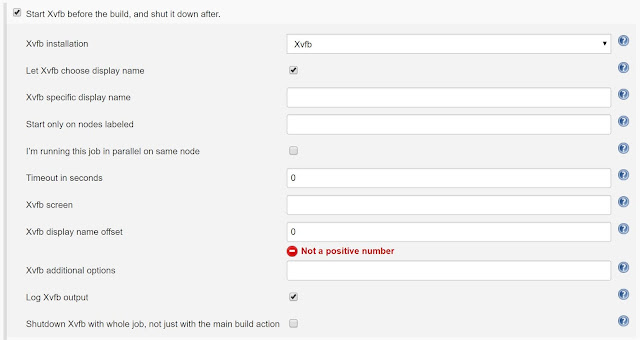
'Start Xvfb before the build, and shut it down after' step

Tuesday, October 17, 2017

Recursively copy files of a specific folder into a single flat folder on Windows

Recursively copy files of a specific folder into a single flat folder on Windows

Use following script, with appropriate folders.

@echo off
for /r "{full path to source dir}" %%a in (*) do copy "%%a" "{full path to flatten dir}"

Thursday, October 5, 2017

VirtualBox: Accessing shared folder from Ubuntu guest

Preconditions

  • VirtualBox is installed.
  • Ubuntu 16.04 is running in VirtualBox.

Instruction

1. Create shared folder. Click settings → Shared Folders → Click 'Add a new shared folder' button.

Shared folders

2. Specify name and path to the folder you want to make shared.

Add shared folder

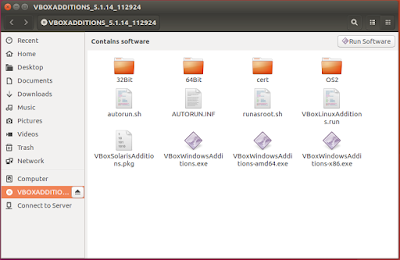
3. In VirtualBox click 'Devices' → Insert Guest Additions CD image → Run with sudo permissions VBoxLinuxAdditions.run program from mounted disk.

VBoxLinuxAdditions.run

4. Make folder

sudo mkdir /home/{user_name}/shared-folder 

5. Mount the folder with the command:

sudo mount -t vboxsf {folder_name_from_step_2} /home/{user_name}/shared-folder

6. Done.

Thursday, September 21, 2017

Creating local network with internet access using VirtualBox and Ubuntu 16.04

Preconditions

VirtualBox is installed. Download link.
Ubuntu 16.04 server is downloaded. Download link.

Creating a virtual machine

1. Run VirtualBox and click 'New' button.
2. Specify virtual machine name.

Setting name and operating system.

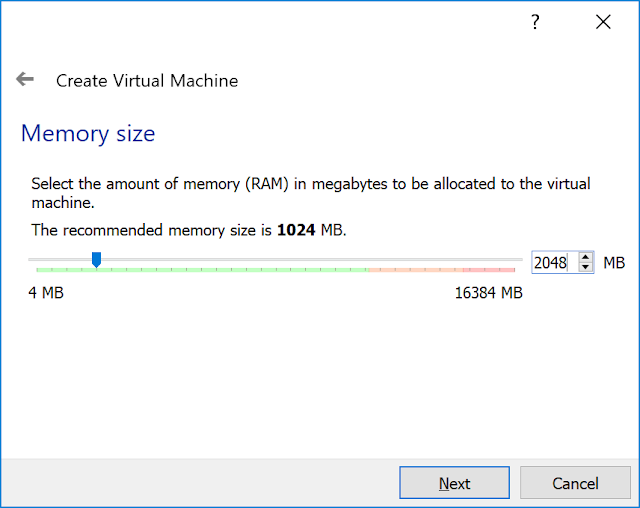
3. Set RAM (Depending on your purpose it could be any value).

Memory size setup.

4. Select 'Create a virtual hard drive now'.

Hard drive setup.

5. Select VDI.

Hard drive file type setup.

6. Select 'Dynamically allocated'.

Storage on physical hard drive.

7. VirtualBox tries to store the image of the hard drive on disk C, so I recommend to change that and save the image on another logical hard drive.

File location and size.

8. Click 'Create' button.

Installing Ubuntu 16.04 server

1. Select the virtual machine and click 'Settings' button on the left top corner of the window.
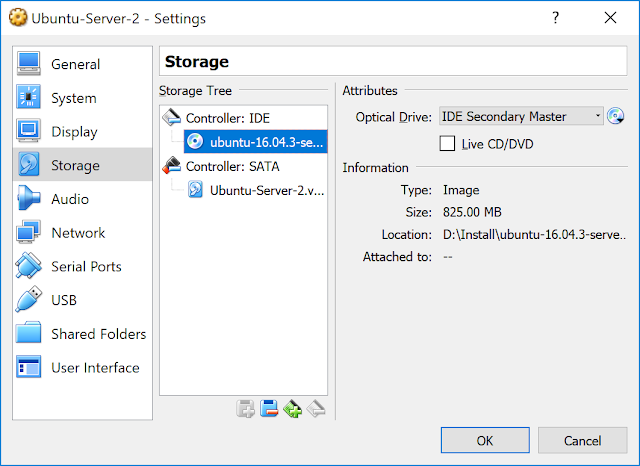
2. Open 'Storage' settings → for IDE controller select download Ubuntu 16.04 image.

Storage settings.

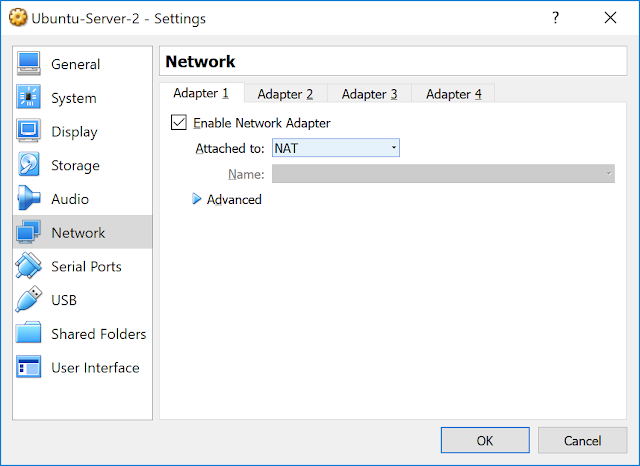
3. Make sure that network settings have 'Attached to' set as NAT. We need this for ubuntu installation, in other mode operation apt-get might not work (see Troubleshooting section for more info).

Network settings.

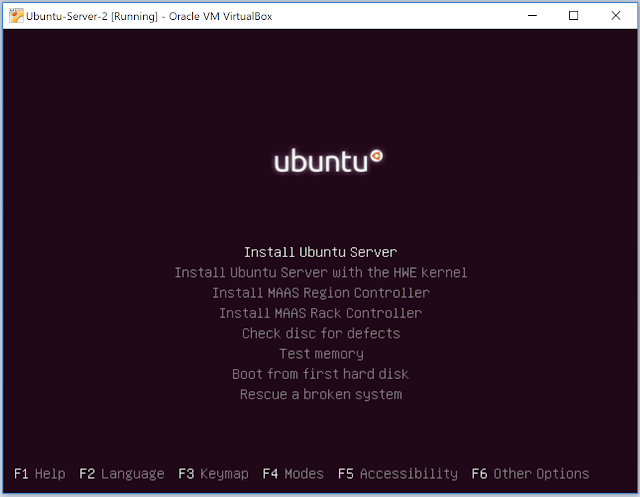
4. Start the virtual machine and follow Ubuntu installation instructions, they are pretty straightforward.

Ubuntu 16.04 installation.


Configuring the virtual machine to work on the local network with internet access.

Now we are ready to configure our virtual machine. To do that follow instructions below:
1. Select the virtual machine and click 'Settings' button on the left top corner of the window.
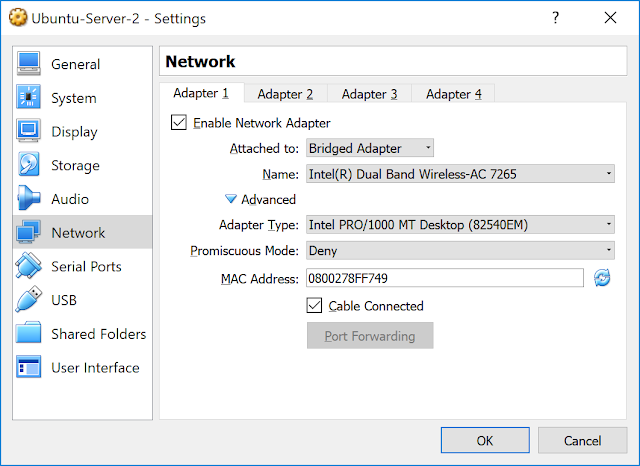
2. Open 'Network' settings → in 'Attached to' select 'Bridged Adapter'.

Network settings. Bridged apapter.

3. Boot the server.
4. Open /etc/network/interfaces with any text editor.

 sudo nano /etc/network/interfaces

5. Set Ip address and DNS server for the server using the following configuration (NOTE: change IP address in case you are configuring multiple servers).

# The loopback network interface
auto lo
iface lo inet loopback

# The primary network interface
auto <your network>
iface <your network> inet static
        address 192.168.1.2
        netmask 255.255.255.0
        gateway 192.168.1.1
        dns-nameservers 75.75.75.75 75.75.76.76
        dns-search local

Troubleshooting

1) If apt-get command does not work due to IPv6 issue. Please follow instructions below to fix it.
https://askubuntu.com/a/787491/733897 

Tuesday, May 23, 2017

Online stopwatch


00:00:00.000
Start Stop Reset
S - start or stop, ESC - reset

Thursday, May 18, 2017

Creating SQL Server database project from existing database

Many enterprise solutions have an existing database in place. To start working with SQL Server project developers have to migrate existing database in it. In this article, I will describe how to migrate the existing database to the database project.

Creating schema compare files

Using Schema comparison tool in Visual Studio, it is possible to compare existing database schema and the schema presented in the project. To start comparison process right-click on project → Schema Compare.

Schema Compare in Visual Studio 2017
 
After that new windows will open. On that screen, we need to select the source and the target databases. Click on 'Select source' drop-down list, then select 'Select source' option.

Select source schema dialog  in Visual Studio 2017

On opened dialog select 'Database' radio button and press 'Select Connection' button. After that, you have to provide database connection information.

Connect to database screen

For 'Target database' select project option.

Select target schema dialog in Visual Studio 2017

Click on 'Compare' button. It might take some time to generate differences, but after that, you will see all items which should be updated in the target database.

Compare results view

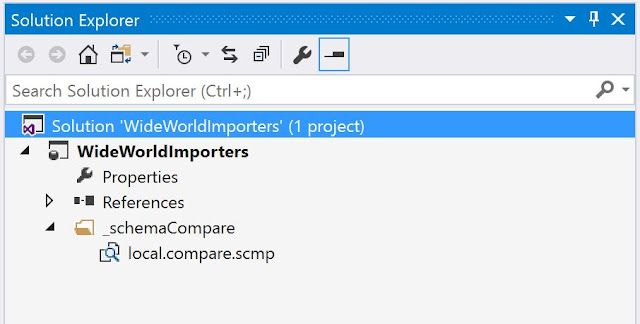
We will save this Schema compare in our solution. It is better to do that because you will rather frequently run the comparison. It will save some time for you in future. You can have multiple 'schema compare' items, e.g., for local database, staging or production databases. I create the _schemaCompare folder in solution to store schema compare items there. Click save schema and save it to created folder and after that add a new item to solution folder.

Project structure with schema compare folder


Configuring schema compare

Sometimes you need to exclude some objects from schema compare or set it in some specific way. It is possible to do. Click on 'Gear' button on the top panel. 

Schema compare configuration

After you configure the schema compare save it and check into project repository. Your schema compare will be available for all team members.


Creating database project from existing database

Now we are ready to create new database project from existing database. Double-click on local.compare.scmp file → Click Compare button → Click Update button → Done!

Conclusion 

In this article, I showed how to work with schema compare in SQL Server database project and how to create database project from existing database using schema compare.  Source code example for this tutorial could be found using the following link: https://github.com/aliakseimaniuk/blog-examples/tree/master/WideWorldImporters/05-Create-Database-Project-from-Database.

Tuesday, May 16, 2017

Configuring SQL Server database project

The configuration of SQL Database project is important. It this article we will learn how to create a basic configuration for the project, which would work in 80% of cases.


Configuring Filegroups

Using multiple filegroups allows for a lot of benefits:
  1. Separating out internal system data from user data
  2. Placing larger tables/indexes on their own filegroup and/or dedicated set of disks for performance
  3. Placing archive (or even read-only) data onto their own filegroups and dedicated set of disks to reduce maintenance overhead
  4. Ability to bring parts of the database online quickly, no need to wait for a full restore
Having your data separated to several filegroups is important. If you interested into this topic, please read DATABASE FILEGROUPS: JUST LIKE SEATBELTS BUT WITH LESS CHAFING or some other materials, which you quickly find using search engines.
In our test project, we will create two filegroups. One filegroup we will use for users' data, another will we use to store indexes. If you forgot how to add new items in solution, please use Creating stored procedures and additional objects in SQL Server Database Project article for more information.

DataFileGroup.sql code


/*
Do not change the database path or name variables.
Any sqlcmd variables will be properly substituted during 
build and deployment.
*/
ALTER DATABASE [$(DatabaseName)]
     ADD FILEGROUP [DATA]

IndexesFileGroup.sql code


/*
Do not change the database path or name variables.
Any sqlcmd variables will be properly substituted during 
build and deployment.
*/
ALTER DATABASE [$(DatabaseName)]
     ADD FILEGROUP [INDEXES]

I've put files in the root of the project. So the structure of the project looks like on the picture below.


Database project has default filegroup with name 'PRIMARY'. We have to change that and set 'DATA' as default filegroup. To change default file group, please use Set default filegroup for Microsoft Database project article.


Configuring Target platform

Target platform specifies the version of SQL Server that you are targeting with this database project. In Visual Studio 2017 there are few possible options for the target platform: 
  • SQL Server 2005
  • SQL Server 2008
  • SQL Server 2012
  • SQL Server 2014
  • SQL Server 2016
  • Microsoft Azure SQL Database
  • etc.
Choose what suits you best. I will keep target platform as SQL Server 2016.


Configuring Default schema

Default schema property specifies the default schema in which both SQLCLR and Transact-SQL objects are created. You can override this setting by specifying schema directly on objects.” In our scenario, we are not going to change default schema.

Configuring Build options (optional)

From my perspective, there is one option among build option which can bring some value to the project. This option is 'Treat Transact-SQL warnings as errors'. This option specifies whether a Transact-SQL warning should cause the build and deployment process to be canceled. If this check box is cleared, warnings appear, but the build and deployment process continues. This setting is specific to the project, not the user, and is stored in the .sqlproj file. Personally, I prefer to set this option to true, because strict rules can reduce potential issues in future. More information about build option you can find using link https://msdn.microsoft.com/en-us/library/hh272681(v=vs.103).aspx#SQLCLR and SQLCLR Build.


Database settings

To change database settings you have to navigate to Project Setting → Database Settings.


Configuring database collation

Collations in SQL Server provide sorting rules, case, and accent sensitivity properties for your data. Collations that are used with character data types such as char and varchar dictate the code page and corresponding characters that can be represented for that data type. Whether you are installing a new instance of SQL Server, restoring a database backup, or connecting server to client databases, it is important that you understand the locale requirements, sorting order, and case and accent sensitivity of the data that you will be working with. 
A collation specifies the bit patterns that represent each character in a data set. Collations also determine the rules that sort and compare data. SQL Server supports storing objects that have different collations in a single database. For non-Unicode columns, the collation setting specifies the code page for the data and which characters can be represented. Data that is moved between non-Unicode columns must be converted from the source code page to the destination code page. Read more about collation https://docs.microsoft.com/en-us/sql/relational-databases/collations/collation-and-unicode-support.
To configure database collation navigate to Project Settings → Database Settings → Common → Database Collation.


Configuring compatibility level

A lot of enterprise solutions have a long history, so many of them started on old versions of SQL server. It might be required to setup your project in compatibility level. To do that you have to navigate to Project Settings → Database Settings → Miscellaneous → Compatibility level.


Code analysis

Code analysis is turned off by default. I recommend to activate it and check all 'Treat Warning as Error' checkboxes. To do that navigate to Properties → Code Analysis. (see picture below)


Conclusion

In this article, I tried to provide vision about the configuration of SQL Server Database project. I highlighted the most common and important settings, which should be configured for each project. You can find source code examples using following link https://github.com/aliakseimaniuk/blog-examples/tree/master/WideWorldImporters/04-Configuring.